Historical May 1992 article. Dates, prices, services and contacts describe the source period; current availability has not been established.
Spring seems to have finally arrived.
The last few days have brought much rain and warmer temperatures.
For those with cool weather lawns (bluegrass and such) this means green grass and frequent mowing.
For those with zoysia (myself included), the greening is still some days away but our time will come.
All this leads to the topic for this month . . . COMPOST. What are we going to do with all the grass clippings that result from lush green lawns?
There are three possible answers to the question.
First, you can cut your lawn frequently and only cut a half inch or so at a time. Leave the clippings on the lawn where they will quickly decay and enrich your lawn—the “Mow it tall, let it fall” method. Second, you can use a bagger attachment on your mower and dump the clippings in the dumpster labeled Yard Waste Only.
The third alternative is the one I am going to practice as I have for the past 20 years.
I plan to compost grass clippings, leaves and some kitchen scraps as an easy and cheap source of plant and lawn fertilizer. And I’ would like to encourage others to do the same. Composting is easy, clean and safe when done properly.
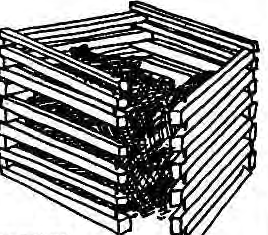
All that is needed is a small amount of space and some sort of simple structure to contain the clippings, etc.
The container should allow air to circulate through the pile and excess water to drain away.
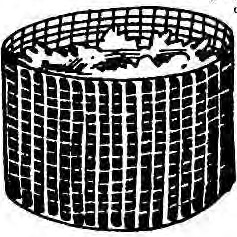
This can be as simple as a three-foot diameter circle of wire • fence.
In my case I use concrete blocks.
My composting operation is against the east side of the garage. • The garage wall forms one side of the bins and the blocks (loosely stacked) form the other three sides.
The openings in the blocks provide all the air circulation needed.
There are two ways to go about composting. One way produces compost quickly and requires a moderate amount of work.
With the quick method you build your pile by layering grass clippings two to three inches deep and then add an inch or so of soil, another layer of clippings, another of soil and so on until you run out of clippings.
Then slightly dampen the pile.
Each time you mow take a spade and turn the pile, thoroughly mixing the contents and then add new layers.
If no new materials are being added to the pile, it should be stirred every five to seven days and dampened if it is drying out.
This method will produce compost in 8 weeks or so.
The process can be speeded even further by adding a cup or two of high nitrogen fertilizer to each layer of grass and soil.
The second way (and the one I use) is much slower but perfect for the lazy gardener.
It may take a full year to produce useable compost but requires almost no labor.
When I have grass clippings (meaning I waited too long to cut the grass and can’t leave the clippings on the lawn), I dump them in my compost bin.
During the spring and summer, vegetable scraps from the kitchen are added to the pile.
We just use a hoe to make an opening in the center of the pile and dump the potato peels, lettuce scraps, egg shells, coffee grounds and such into it.
Then pull the clippings over to cover the scraps two to three inches deep.
I also put the ashes from my barbecue grill in the pile and if we have a long dry spell I water the pile.
In the fall, leaves, preferably mulched with the lawn mower, are added.
If I am feeling really ambitious, I may use the spade and turn the pile once or twice between June and September.
In the spring, I take the top six inches off last year’s compost heap (leaves and clippings that haven’t fully decomposed) and use that material to start the new operation.
My system requires two compost bins. One contains completed compost ready to be used on the lawn, garden and flower beds.
The second one contains the materials I am collecting during the current growing season. By the time the summer ends I have usually used the compost in bin one and that is where the new pile goes next year.
I can almost hear the skeptics: “A compost pile will smell bad.” “It will draw flies, mice and rats.” I can only answer on the basis of 15 plus years of composting.
I have never had a problem with odor or pests (except for a Bassett hound who liked to dig for lettuce).
If the pile stinks, it is probably too wet. Stir it and put a cover over it.
It will not attract pests if some simple do’s and don’ts are followed. DO: • Dampen the pile if it is really dry. • Stir or turn the pile over once or twice a summer. Do cover it if it gets too wet. DON’T: • Use meat scraps, bones, or any vegetable or animal oils.
These are the things that will draw pests to the pile. • No cat or dog manure. Pet parasites can be a real problem. One final note.
The ultimate test of a healthy compost pile (in my view) is the presence of worms.
They are the ultimate compost processors.
If I ever need worms to go fishing I know just where to find lots of big, active worms even on a hot summer day.
I take my spade and dig down into my compost pile.
They always seem to be there waiting for me.
Original photograph caption
Original square compost-bin illustration. Illustrator not credited.
Originally published in The Times of Skinker-DeBaliviere, May 1992.
Read this article in the original newspaper issue.
Original source: SD_Times1992_05.pdf, printed page(s) 5; PDF page(s) 5.
